

The Stopped Clock: a Mortal Shell 2 Smert build
Live under half health, then take the time back.
This is the Mortal Shell 2 Smert build, and it is built on the one thing his kit keeps asking for: a low health bar. Deadly Revelation only switches on at 10% Health or lower, so every stone here either pays you more for being hurt or keeps you alive while you are, and the Resolve it all feeds goes to one place — Miracle, which halts time so your fists can pile Chaos stacks onto something that detonate the moment the clock restarts. It is the most dangerous loadout on this page and the one that ends a crowded room fastest.
The loadout
- ShellSmert the Apostate
Miracle is the only ability in the game that takes the fight's timing away from the fight, and Deadly Revelation pays a bar's worth of Faith for standing where nobody wants to stand.
- SealVatra's Seal
Harden is the only defence that still works once you have committed to a swing, and a build living below half health cannot afford a single answer that arrives too late.
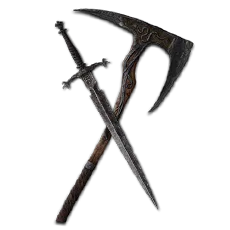
- WeaponAxe and Dagger
Miracle is expensive and Resolve comes from landing hits, so a paired weapon built on the light string is the shortest road back to the next one — doubly so with the Duality Stone in it.
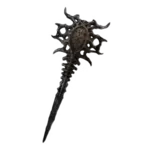
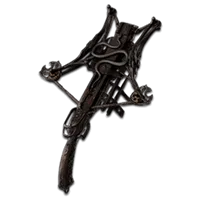
- SidearmTriarch Repeater
It fires quickly for a small cost per shot, which makes it the one sidearm that refills the bar faster than it drains it.
When it comes togetherHalf a build from the moment you claim Smert at Prophet's Rest, and a whole one only once the Berserker's Stone is out of the Temple of Vatra and Fervor is paid for. The Triarch Repeater is late — run the Forgotten Crossbow until Castigator's Keep.
Tarstones
Listed in priority order — slot them in this sequence as you find them rather than waiting for the full set. Every stone below is one the named gear actually accepts.
Axe and Dagger
Weapon socketTied to the primary, so changing weapon means revisiting this list.
Duality StoneCombatslot first
Your light combo strikes twice, and because Resolve is earned per hit rather than per second, that is your income doubled as much as your damage.
Grudge StoneCombat
A guaranteed critical on a fixed count of attacks, which is worth far more on a weapon that swings this often than on one that does not.
Unyielding StoneCombat
Stagger immunity across the light combo, and at low Health being interrupted is the mistake that ends the run rather than the combo.
Parasitic StoneCombat
Leech on every kill: a trickle rather than a heal, which is exactly right for a build that has to stay wounded to be paid.
Triarch Repeater
Sidearm socketDrawn from a pool the melee slot mostly cannot touch.
Spite StoneSupportslot first
Ranged damage rises the lower your Health is — by level four, up to 160% at half Health or below, which is precisely the band this build lives in.
Unstable StoneCombat
Five hits on one enemy triggers an explosion, and four by level four. Nothing else in the ranged slot reaches that count as quickly as the Repeater does.
Volatile FragmentCombat
Enemies killed at range explode, which turns the mop-up after a detonation into the start of the next one.
Smert the Apostate
Shell socketThese fit whatever else you are carrying, which makes them the picks that survive any change of weapon.
Berserker's StoneSupport
Melee damage climbing to 165% at half Health or below, once it is at level four. This is the stone the whole loadout is arranged around, and it is in a chest in the Temple of Vatra.
Devout StoneSupport
Doubled Resolve gain from melee at level four, which is how a build that spends everything on one ability affords to use it twice in a fight.
Skill tree priorities
Nodes from Smert the Apostate's own tree, in the order they are worth spending Glimpses on.
Fervortake first
Raises the Health at which Faith arrives from 10% to 35%, which is the difference between a passive that fires as you die and a band you can deliberately live in.
Resilience
A chance to negate a fatal blow and heal instead, at the exact Health this build refuses to leave. Take it before anything in tier three.
Kicker
A Kick in Fight Stance that applies Chaos and, one level on, detonates it immediately — a second detonation inside a Miracle that would otherwise pay out once.
Beatdown
A Ground Punch that hits everything in range with Chaos and resumes time on the spot, which is the crowd answer the rest of the kit does not have.
Last Vow
The fork, and read it twice before spending on it: Smert permanently enters Fight Stance and stops using a melee weapon at all, which retires every weapon Tarstone above this line.
How to play it
Open at range with the Repeater and let something hit you — the build does not start paying until the health bar is down.
Work the light combo for Resolve, not for damage. The damage is coming later and all at once.
Harden through the swing you cannot dodge rather than backing out of the string.
Spend the bar on Miracle with the room still full, and punch every target you can reach before the clock restarts.
Detonate, kill what is left with the Repeater, and stay under half Health rather than topping up out of habit.
If you have not found it yet
Each of these plays close enough to the piece it replaces that the rest of the page still holds.
The Iconoclastinstead of the Axe and Dagger
It takes the Grudge, Unyielding and Parasitic Stones too and you already own it — you lose the Duality Stone, which only the Axe and Dagger and the Axatana accept.
Forgotten Crossbowinstead of the Triarch Repeater
It holds all three ranged stones above and sits in the Flooded Village, which is most of a game earlier than Blackwell Cavern.
What it is bad at
It asks you to stand in the one place every other build on this page is trying to avoid. Anything that hits hard enough to take you from a third of your health to none in a single swing does not care how much damage the Berserker's Stone was about to give you, and Miracle is a large amount of Resolve to be holding when that happens. Against a fast single boss you are a glass cannon with the glass facing outward.