
Which of the 4 Seals should you be using?
The Seal occupies one slot and decides how you answer an incoming attack, which makes swapping it closer to changing class than changing gear. There are 4: 3 defences that feed the same engine, and one that is not a defence at all. This is a decision, not a ranking — none of these is strictly better than the others.
Ranked as of Balance Patch 1, August 21, 2026. Every balance change we hold is on the patch log, so you can see what has moved since.
What actually separates the Seals?
Not power. 3 of the 4 feed the same engine: land the defence at the right moment and you deal Break Damage, and enough Break Damage opens a Riposte. Every one of them is a way of arriving at the same payout, so ranking them against each other would really be ranking your own reflexes.
What separates them is three things, and none of them is a number. How wide the timing window is. What a miss costs — a resource, a hit taken, or a fight. And whether the answer still works once you have already committed to a swing, which exactly one of them does. Read the cost column below before the verdict; it is where the difference lives.
The fourth Seal is not part of that comparison at all. It grants no defence, and what it changes is the value of your other slots — which makes it the only one of the 4 you can take by mistake. The Seals category carries the short version of all of this above the list.
All 4 Seals compared
| Seal | Grants | Take it when | It costs you | Where it is |
|---|---|---|---|---|
| Untarnished Seal | Guard | A first run, and any fight you are still learning. | Guard Energy on every block. Run the bar dry and you are stunned. | Given with Harros the Vassal in the Prologue |
| Vatra's Seal | Harden | Aggressive builds, and anyone who keeps getting hit mid-combo. | One attack at a time. Harden answers the next hit, not the next three. | Dropped by the Tar Golem in the Disciple's Grotto |
| Infinite Seal | Parry | A second run, or a boss whose moveset you have settled on. | No partial credit. A missed Parry is simply a hit taken. | Given by Sester Genessa for clearing her training in Marrow Keep |
| Slayer Seal | Gloomslayer, Slayer Punch | Ranged builds, and any build whose Resolve spending has outrun its income. | The slot. Take this and you are not carrying Guard, Parry or Harden. | On the red throne right of Merrick in Marrow Keep |
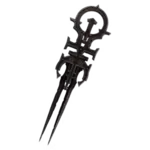

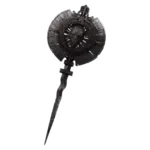

The split in that table is read off the abilities rather than decided here: Untarnished Seal, Vatra's Seal, Infinite Seal each grant one of the three moves the catalog holds as an answer to an incoming attack. Slayer Seal grants 2 abilities and none of them is that.
When should you use the Untarnished Seal?
Start here and stay until a moveset stops surprising you.
- What it grants
- Guard
- What the game says it does
- Block incoming attacks with your Weapon. Time it right to Perfect Guard and deal Break Damage.
- What it costs you
- Guard Energy on every block. Run the bar dry and you are stunned.
- Where it is
- Given with Harros the Vassal in the Prologue
- Builds that run it
- Break and Riposte, The Prologue Loadout
Guard has the widest margin for error of any defence in the game, and a Perfect Guard still deals Break Damage — so the safest answer to an attack is also progress toward ending the fight. The trade is that blocking spends Guard Energy whether or not you timed it, which makes this Seal forgiving of bad timing and unforgiving of bad discipline. It costs nothing to keep: the prologue hands it to you with Harros.
When should you use Vatra's Seal?
The only defence that still works after you have committed.
- What it grants
- Harden
- What the game says it does
- Harden your body to withstand the next attack damage. Time it right to Perfect Harden and deal Break Damage.
- What it costs you
- One attack at a time. Harden answers the next hit, not the next three.
- Where it is
- Dropped by the Tar Golem in the Disciple's Grotto
- Builds that run it
- The Shadow Poisoner, Twice Over, The Stopped Clock
Harden is the move the series is known for and it solves a problem no other Seal touches: you are mid-swing, something is coming, and you cannot cancel. Perfect Harden pays Break Damage on top, which makes it the rare defence that costs you no tempo at all. If you are dying inside your own combos rather than outside them, this is the fix. Where it comes from is on record — the Tar Golem drops it, at the end of the prologue — but when it reaches you is not: that fight ends in a cutscene whichever way it goes, and no account we hold says which side of the cutscene hands the Seal over. Expect it around the end of Disciple's Pass rather than at a moment you can plan.
When should you use the Infinite Seal?
The upgrade you take once you already know the fight.
- What it grants
- Parry
- What the game says it does
- With proper timing, Parry incoming attacks, breaking enemies more efficiently but at a greater risk.
- What it costs you
- No partial credit. A missed Parry is simply a hit taken.
- Where it is
- Given by Sester Genessa for clearing her training in Marrow Keep
- Builds that run it
- Clockwork Lightning, The Curse Carrier
Parry breaks enemies more efficiently than Guard does, at a greater risk — a smaller window and nothing to catch you when you miss it. What you buy with that risk is shorter fights, because better Break Damage opens Ripostes sooner. It rewards knowing a moveset and punishes learning one, which is why it is worth switching to rather than starting on. Sester Genessa's training in Marrow Keep pays it out, and that conversation is five minutes long.
When should you use the Slayer Seal?
Not a defence at all — a Riposte economy in the Seal slot.
- What it grants
- Gloomslayer, Slayer Punch
- What the game says it does
- Sidearms deal Break Damage. Some Health and Resolve are restored when Riposting an enemy in a glorious manner.
- What it costs you
- The slot. Take this and you are not carrying Guard, Parry or Harden.
- Where it is
- On the red throne right of Merrick in Marrow Keep
- Builds that run it
- Blood and Hunger, The Marksman
The other three Seals answer an attack; this one changes what your other slots are worth. Sidearms start dealing Break Damage, which turns the ranged slot from chip damage into a way to set up Ripostes, and a clean Riposte returns Health and Resolve — so aggression starts paying for itself. Read the cost line before you take it: this is the build-around option, not the safe one, and it is sitting on the red throne right of Merrick in Marrow Keep the whole time.
When should you switch Seals?
When the way you are losing changes. If you are dying to attacks you saw coming and answered too slowly, you want the wider window rather than the better break, and the Untarnished Seal is that. If you are dying to attacks you saw coming and answered correctly, only for the fight to drag on anyway, the Infinite Seal is the one that shortens it. If you are dying in the middle of your own combos, neither of those helps and Vatra's Seal does.
The fourth has a trigger of its own, and it is not about how you are dying. Take the Slayer Seal when the answer to “who is this for?” on its row starts describing you — ranged builds, and any build whose Resolve spending has outrun its income. That is a change to what your other slots are worth rather than to how you answer an attack, which is why it is the one swap you can make without changing how you play at all.
None of this is a one-way door. All 4 are found, dropped or handed over rather than crafted, and none of them has an upgrade ladder to strand your materials in — so once you hold two, carrying the wrong one is a habit rather than a commitment. If a fight feels impossible, change the Seal before you change anything else. The boss list is mostly a list of different timings to practise against.