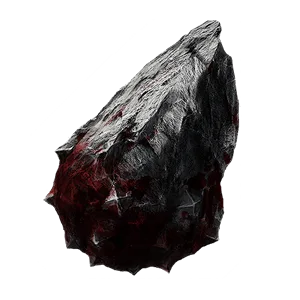
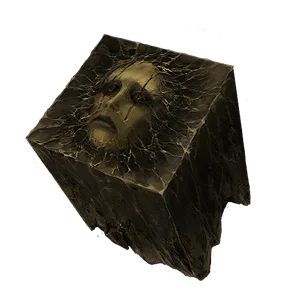
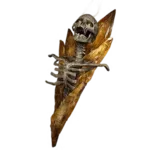
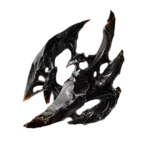
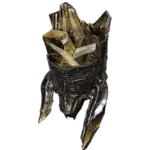
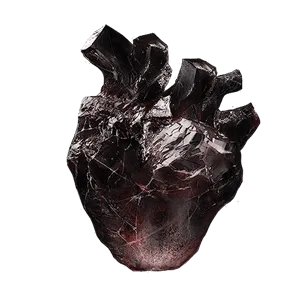
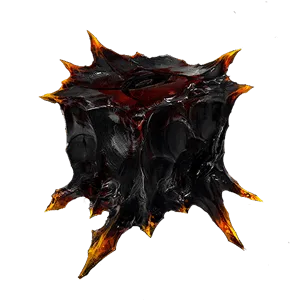
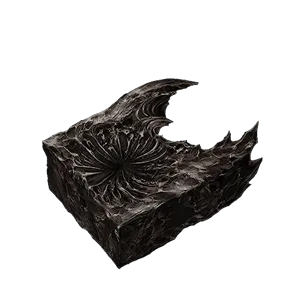
A Tarstone ranking that covered all 78 would be padding: 21 of them fit exactly one piece of gear, so ranking those is ranking the weapon again. This ranks the 23 a loadout is actually decided by — grouped by the socket they compete for, because a Shell stone never takes a sidearm's place — and says outright which 55 it leaves alone.
Ranked as of Balance Patch 1, August 21, 2026. Every balance change we hold is on the patch log, so you can see what has moved since.
How this list picks 23 stones out of 78
By a rule rather than by taste, and the rule is checked on every build. A stone is ranked here when two or more of our 9 build guides socket it — that is 21 of them — or when every weapon or every sidearm in the game accepts it and none of those builds picks it, which is 2 stones: Enfeebling Stone and Thief's Stone. A stone everything can take and nothing wants is a verdict too, so those are ranked rather than quietly dropped.
What that leaves out, and why. 21 stones appear on exactly one weapon or sidearm's compatibility list, so what to think of them is a question about that piece of gear and is answered on its page. 6 appear on no gear list at all, which is upstream still writing rather than a rule of the game — there is nothing to rank them on. And the upgrade ladder cannot separate them either: 76 of the 78 have every rung on record, so being documented stopped being a distinction some time ago. All 78 are listed with their four rungs on the Tarstone levels page, and the compatibility chart answers the other direction — which stones a given weapon will take.
Every comparison below is drawn on one basis: the number of weapons and sidearms whose own compatibility list names the stone, inverted onto the stone as the catalog does it. On that basis 13 stones fit every weapon and 9 fit every sidearm, which is the pool any loadout can draw on regardless of what it is carrying. Voltaic Crown is the only stone in the game that fits a primary and a sidearm both. Resolve costs, level-four text and locations are the stones' own; the letters are ours.
The weapon slot9
9 of the 29 stones the catalog files under this socket are ranked here. The Gear column is the basis every comparison on this page is drawn on: the weapons and sidearms whose own compatibility list names the stone. A count equal to the whole class is a stone any loadout can take.
Worth restructuring a playthrough to get hold of, and worth keeping once you have.
Grudge StoneS
What it does
Your Weapon deals a guaranteed Critical Hit
Gear that takes it
8
Where it is
Bone chest in the Citadel of Penance
Every primary in the rack accepts it, four of our nine builds carry it, and at level four it hands you a guaranteed critical hit every five attacks. It is a Combat stone, so there is no Resolve line on it and nothing to time — the cycle counts attacks, which means the faster the weapon swings the more often the guarantee lands. That is the rare stone with no argument against it and no build it does not improve. A bone chest in the Citadel of Penance has it.
Consume 15 Resolve to infuse your Weapon with Poison
Gear that takes it
2
Where it is
Dropped by Lucian, the Thirsting Knight in The Hidden Keep
Fifteen Resolve is the cheapest infusion cost in the catalog, and at level four the infusion stops expiring — so the whole price of running Poison permanently is fifteen Resolve, once. Only two primaries take it, and that is the entire case against it: everything else about the stone is the best version of what an Infusion does. Lucian, the Thirsting Knight drops it in The Hidden Keep, and the two builds that carry it are built on Poison rather than decorated with it.
No argument against taking one of these. Which you take depends on what you want to be doing.
Unyielding StoneA
What it does
Your Weapon light attack combo has Stagger immunity
Gear that takes it
3
Where it is
Trial statue north of the Deserted Mine dungeon
Four of our nine builds socket it and only three primaries accept it, which is as close as this catalog comes to a stone being worth choosing a weapon for. Stagger immunity on the light combo covers the first attack at level two, the first two at three, and all of them at four — and a light string that finishes is the difference between applying a status and being knocked out of applying it. It ranks below the S pair because it protects a plan rather than being one.
Locked bone chest inside the Martyr's Tomb dungeon
Every primary takes it and three builds carry it, for one line: slaying foes grants Leech, three stacks a kill at level four. That is sustain that scales with how well the fight is going rather than with a stock of items, which makes it the stone that quietly decides whether a room full of small enemies costs you anything. It wants a weapon that kills quickly, and against a single boss it does nothing at all.
Consume 35 Resolve to perform a Charged Heavy Attack.
Gear that takes it
8
Where it is
Sold by Merrick at Marrow Keep for 2,000 Coin
The only stone on this list with a price rather than a location: Merrick sells it at Marrow Keep for 2,000 Coin, and every primary takes it. Twenty-five Resolve buys a charged heavy that at level four restores 35 Health and five Leech stacks on a kill, which is a healing item you can use in the middle of a combo. It is an Ability stone, so it is competing for Resolve with your weapon ability — that is the trade, and on a build that is not spending Resolve elsewhere it is a bargain.
Real strengths and a real condition attached. Excellent where it fits, ordinary where it does not.
Auspicious StoneB
What it does
Improves melee Critical Chance.
Gear that takes it
6
Where it is
Bone chest at the Mushroom Village entrance, opened by lighting three offerings
Six of eight primaries and two builds, for a flat +18% melee critical chance at level four with no condition attached at all. Being unexciting is the whole point: it has no fight it is bad in and no setup to learn, and it is the stone that makes every critical-damage stone in the Shell slot worth more than it looks. It sits in B rather than higher because a percentage is the one thing a stone can offer that another stone cannot build a run around.
Chest by the cliff behind an illusory wall in the Ruins of Nochte
Six of eight primaries and two builds. It grants a heavy combo finisher of its own, carrying +30% critical chance at level four over the swing it replaces — a real addition to a moveset rather than a modifier on one. What keeps it here is that the finisher only pays out at the end of a string you had time to throw, which is a condition every crowd and half the bosses in the game will decline to give you. Behind an illusory wall in the Ruins of Nochte.
Consume 60 Resolve to spin in place and release your weapon with brutal force
Gear that takes it
2
Where it is
Dropped by the Lost Child at the Sanguine Caverns gate
Sixty Resolve at level one and forty at level four — after the discount it is still the most expensive thing on this list to press. What it buys is genuine: a spin that releases the weapon for 300% damage to the struck target and 200 splash around it. Two primaries take it and two builds carry it, both for the same moment, which is three enemies arriving at once. Pay that price in a crowd and it is excellent; pay it in a duel and you have spent your ability bar on one hit.
CWhich come with a real cost, or too little on record?
A trade-off you have to accept, or a gap in what anybody has written down that we will not rank past.
Thief's StoneC
What it does
Striking a foe grants you Warp.
Gear that takes it
8
Where it is
The Thief's Stone is obtained as a reward for clearing the Corrupted Statue in the Vestige of Infinity.
Every primary accepts it and not one of our nine builds picks it, which is the reason it is on this page at all. What it grants is real — Warp is stacking attack speed, three stacks per melee strike at level four, and it rewards staying on one target rather than rotating between them. But stacking speed is worth what the rest of the loadout can do with it, and every build we have written would rather spend the socket on a guaranteed critical or on Leech. C is where our argument stops, not where the stone does.
9 of the 28 stones the catalog files under this socket are ranked here. The Gear column is the basis every comparison on this page is drawn on: the weapons and sidearms whose own compatibility list names the stone. A count equal to the whole class is a stone any loadout can take.
Worth restructuring a playthrough to get hold of, and worth keeping once you have.
Corroded StoneS
What it does
Projectiles start dealing damage over time after hitting their target.
Gear that takes it
8
Where it is
Bone chest in the Wortbriar Encampment dungeon
The most-carried stone in this ranking: four of nine builds, and every sidearm in the game accepts it. Projectiles start dealing damage over time on hit, reaching 15% damage every seven seconds for thirty at level four — off any shot, with no critical requirement and no Resolve. That makes the ranged slot useful on a melee build without asking the build to change, which is exactly what most people want from a sidearm. A bone chest in the Wortbriar Encampment dungeon holds it.
No argument against taking one of these. Which you take depends on what you want to be doing.
Emberseed StoneA
What it does
Consume 20 Resolve to infuse your sidearm with Burn. The equipped Sidearm inflicts Burn on Critical Hits only.
Gear that takes it
8
Where it is
Bone chest in the Passenger's Shrine dungeon, Mushroom Village
Every sidearm takes it, twenty Resolve applies it, and at level four it stops expiring — the same shape as the Serpent Stone one slot over, five Resolve dearer. The condition is written on the stone rather than hidden: the sidearm inflicts Burn on critical hits only, so this is worth most beside a stone that raises critical chance and worth least on a slow, single-shot weapon. Two builds carry it, one of them as a first infusion rather than a final one.
Projectiles that strike critically deal Break Damage
Gear that takes it
8
Where it is
Chest on the platform above the Prisoner's Domain boss arena
Universal across the slot, and the only stone here that contributes to the meter that actually ends fights: critical projectiles deal Break Damage, twenty of it at level four. On a defensive build that is a second source of Break running while both hands are busy, which is why two of ours carry it. The critical requirement is the catch, and it is the same catch the Emberseed Stone has — pair it with what raises critical chance or accept that it fires blank most shots.
Enemies dying by a ranged attack will explode, dealing splash damage.
Gear that takes it
8
Where it is
Dropped by Vrannic the Grand Illusionist in the Hall of Illusions
Enemies killed at range explode for 35 splash damage at level four, on every sidearm in the game. In a corridor that is a chain reaction and in a boss arena it is nothing, which is as clean a condition as this list has. Two builds carry it and both are crowd builds. Vrannic the Grand Illusionist drops it in the Hall of Illusions, so it arrives as the reward for a fight rather than as a chest you might walk past.
Your Sidearm fires multiple projectiles in an arc without consuming additional Resolve.
Gear that takes it
2
Where it is
Alcove chest in the Feeding Grounds dungeon
Only two sidearms accept it and two builds take it anyway. At level four one shot becomes seven projectiles at 35% damage each and consumes no additional Resolve — call that 245% of the shot you paid for, spread across seven chances to apply whatever status the slot is carrying. On a build that fires to apply rather than to kill, nothing else in the slot is close. On a build that fires for damage, seven fractions of a hit is worse than one whole one.
Consume 30 Resolve to infuse your Weapon with Lightning
Gear that takes it
5
Where it is
Dropped by Vrago, Solikar Champion in the Prisoner's Domain
The one Tarstone in the catalog that fits both a primary and a sidearm — three weapons and two sidearms name it — and both builds that carry it socket it on the weapon, which tells you where the value is. Thirty Resolve is the dearest infusion on this page, and level four makes it permanent like the others. You own one, so the dual fit is a choice rather than a bonus. Vrago, Solikar Champion drops it in the Prisoner's Domain.
Real strengths and a real condition attached. Excellent where it fits, ordinary where it does not.
Spite StoneB
What it does
Improves ranged damage the lower your Health is.
Gear that takes it
8
Where it is
The Spite Stone is obtained from a chest found inside the Bellkeeper's Corner dungeon near the Abandoned Outpost beacon.
Every sidearm takes it, and what it gives is conditional in the strongest way on this list: ranged damage up to 160% when Health is at 50% or below, at level four. That is not a stone you equip, it is a build you commit to — and the two builds that carry it are exactly the two arranged around staying wounded. Run it on anything else and you have a socket that pays out only when you have made a mistake. Bellkeeper's Corner, near the Abandoned Outpost beacon.
Hitting the same enemy 5 times triggers an explosion that deals splash damage.
Gear that takes it
3
Where it is
The Unstable Stone can be looted from a chest located west of the Castigator's Keep beacon. This chest is very missable as it is hidden behind an enchantment. Hit the walls of the spire to reveal the chest.
Three sidearms, two builds, and one number that decides everything: the explosion triggers after five hits on the same enemy, four once the stone is at level four. Whether that is good is a question about your sidearm's rate of fire rather than about the stone, which is why both builds carrying it name a fast one. The chest west of Castigator's Keep is hidden behind an enchantment — hit the walls of the spire — so this is also one of the easiest stones in the game to walk past.
Projectiles generate a Knockback shockwave on impact.
Gear that takes it
4
Where it is
The Shuddering Stone can be found in a chest inside the Illusionist's Cache, a dungeon in The Desolate Peak.
Four sidearms and two builds, for a knockback shockwave on impact. It sits here rather than higher because of what its ladder does not say: the four rungs read small, medium and large, and no source we hold puts a number on any of them. Knockback is genuinely useful on a build that needs a moment to breathe, and we will not rank a stone above the ones we can price when the only thing on record about it is an adjective.
3 of the 7 stones the catalog files under this socket are ranked here. The Gear column is the basis every comparison on this page is drawn on: the weapons and sidearms whose own compatibility list names the stone. These go in the Shell's own sockets and fit whatever else you are carrying, so read the count as reach rather than as a restriction.
Worth restructuring a playthrough to get hold of, and worth keeping once you have.
Devout StoneS
What it does
Killing an enemy with your Sidearm generates Resolve
Gear that takes it
8
Where it is
Behind a wall mechanism north of the Sester's Gate beacon
Three of our nine builds carry it, more than any other Shell-slot stone, and the reason is that it does not raise a number anyone fights with. Melee attacks generate +100% Resolve at level four, and Resolve is the single bar your weapon ability, your sidearm and every Ability stone are all drawing on. Doubling the income decides whether a build gets to use its plan twice in a fight or once. Behind a wall mechanism north of the Sester's Gate beacon.
No argument against taking one of these. Which you take depends on what you want to be doing.
Headsman's StoneA
What it does
Improves melee Critical Damage
Gear that takes it
8
Where it is
Hidden rise below the Road of Absolution bridge, Ruins of Mammon
Melee critical damage up by half at level two and doubled at level four, which is the multiplier every critical-chance stone in the weapon slot is waiting for — the two stack into one plan and neither is worth as much alone. Two builds carry it. It ranks below the Devout Stone because it makes good hits better where the other decides how often you get to act at all. On a hidden rise below the Road of Absolution bridge.
Real strengths and a real condition attached. Excellent where it fits, ordinary where it does not.
Berserker's StoneB
What it does
Improves melee damage the lower your Health is
Gear that takes it
6
Where it is
Chest in the Temple of Vatra, opened by lighting three candles
The largest single multiplier on this page — melee damage up to 165% at level four — and the largest condition attached to one: Health at 50% or below, and at level two you had to be down to 35% before it paid anything at all. So the stone gets easier to satisfy as you level it, and it is worth most in exactly the situation you were trying to avoid. Two builds are arranged around that on purpose; on anything else it is a socket that only opens when you are nearly dead. A chest in the Temple of Vatra, opened by lighting three candles.
1 of the 2 stones the catalog files under this socket are ranked here. The Gear column is the basis every comparison on this page is drawn on: the weapons and sidearms whose own compatibility list names the stone. A count equal to the whole class is a stone any loadout can take.
CWhich come with a real cost, or too little on record?
A trade-off you have to accept, or a gap in what anybody has written down that we will not rank past.
Enfeebling StoneC
What it does
Projectiles inflict Fragile
Gear that takes it
8
Where it is
Reward for the trial due east of the Outskirts of Mammon beacon
The other stone every piece of gear in its class accepts and no build of ours takes. Fragile is applied at range, seven stacks a shot at level four, so the shots softening a target are the ones already hurting it — which is a good idea and a slot our builds keep spending on damage over time or on Break instead. Nothing here is a flaw. It is a stone waiting for a build that wants a debuff more than it wants a second damage source.
1 of the 1 stones the catalog files under this socket are ranked here. The Gear column is the basis every comparison on this page is drawn on: the weapons and sidearms whose own compatibility list names the stone. A count equal to the whole class is a stone any loadout can take.
No argument against taking one of these. Which you take depends on what you want to be doing.
Duality StoneA
What it does
Your weapon's light attack combo strikes twice.
Gear that takes it
2
Where it is
Chest by the second gate of the Ravaged Tomb
Two primaries accept it and three builds carry it anyway, because what it does is not really damage. Resolve is earned per hit landed, and at level four every attack in the light combo strikes twice — so this is your Resolve income doubled on the weapon that was already earning fastest, and a second application of whatever infusion is on it. The chest is by the second gate of the Ravaged Tomb. Take the narrow fit as the cost of the best economy stone in the slot.
The ones whose top rung changes what the stone is rather than what it scores, and on this page that is the Infusions: 3 of the 3 ranked here end their ladder with the infusion becoming permanent, so the last level does not make the effect bigger, it stops you paying for the effect. An infusion you re-apply costs Resolve every time, out of the same bar your weapon ability and your sidearm are already spending — which is also why the Devout Stone ranks where it does.
After that, level what your loadout already leans on rather than spreading across a dozen stones: a stone gains experience only while it is equipped, and the Tarforge will not take one past level 1 until Franz has the Etching Needles. The build guides name their stones in the order they are worth slotting, and every one is checked against the gear it is named for, so a stone that does not fit fails the build rather than reaching you.