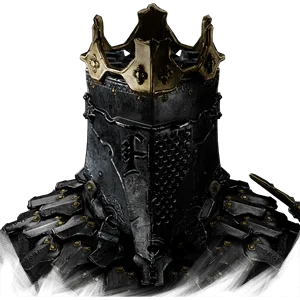
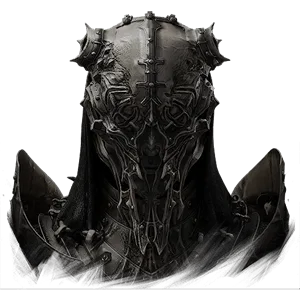
A Shell is the one slot a weapon cannot make up for, and choosing badly costs you Glimpses you do not get back. So this is our order, with the argument attached to every placing — 2 Shells at the top, 9 in total, and nothing ranked on anything the catalog does not state.
Ranked as of Balance Patch 1, August 21, 2026. Every balance change we hold is on the patch log, so you can see what has moved since.
How this list is ranked
Passive first, active second, and the reason is arithmetic rather than taste: an active is used a handful of times a fight out of a bar you were saving for the weapon, and a passive is running for the whole of it at no cost. So a Shell whose passive changes what happens when you lose outranks one whose active hits harder, every time.
Second: how much of the Shell is conditional. A flat 10% damage reduction pays every fight; a 15% chance to mitigate pays some of them. Both are good, and only one of them is a plan. Third, and last, is the skill tree — 8 of the 9 carry four tiers of nodes, and a tier-4 node is usually a different effect rather than a bigger number, so a Shell you commit to is worth more than the same Shell sampled.
What this list does not rank on is damage figures, because the catalog holds none for a Shell, and neither does anybody else. If a placing needed a number nobody has written down, the placing is argued from what is written down instead — and where that leaves the argument short, the verdict says so rather than inventing the number.
Every Shell here has a build guide behind it, which is the honest test of a ranking: if we could not write a loadout for one, it had no business being on the list. The unlock guide says where each body is and what is standing in front of it.
SWhich are worth building a run around?
Worth restructuring a playthrough to get hold of, and worth keeping once you have.
Genessa the WaywardS
Nothing is so broken it can’t be made whole again.
Duality is the only passive on this list that answers losing rather than winning: run her health out and Genessa turns Stray instead of being severed from the Harbinger. Nothing else in the catalog sells that at any price. The rest of the kit is upside stacked on top — one of only two Shells carrying a second active, and the only one whose doubles copy sidearm attacks as well as weapon ones. A ranged build on any other Shell is one set of shots; on Genessa it is two.
Revered Heart is renewable healing and nothing else here has any. It restores a portion of Health and its power is replenished by slaying foes, so Gragu's sustain scales with how well the fight is going instead of draining a stock of items you were saving for the boss. Staggering Blow asks you to stand still and charge; the passive is what buys the room to do it.
The only Shell with flat damage reduction — a base 10% for as long as his armor is on — which is the dullest line in the catalog and one of the most useful. Retribution rewards repeated use with a stronger shockwave and Burn stacks, at the price of Overheat temporarily disabling the armor you took him for. Learn a hard fight on Lazlo: he is the Shell that lets you afford the mistakes that teach you a moveset.
Shadow Dash pays out for dodging late rather than early — just before the hit lands — which fuses your defence and your offence into one input and hands you Stagger Damage for a movement you had to make anyway. That makes Tiel the Shell that improves as you improve rather than as you spend Glimpses. He sits below the top two only because every point of that payout is conditional on a timing you have to earn first.
Both actives deal Break Damage and the passive banks a Slaughterer stack on every Riposte, so the whole Shell is one loop instead of three unrelated buttons — and Break is the meter that actually ends fights here. The catch is on the record rather than hidden: stacks are lost on resting or being severed. Eredrim charges you for the beacon runs everyone else takes for free.
Biosampler is the closest thing in the game to a distance control — it hooks the enemy to you or you to the enemy and follows up with Lightning — and Grafted Armor's mitigation prevents stagger as well as cutting the damage, which saves the combo and not just the health bar. It ranks here rather than higher because the passive is a base 15% chance. That is a coin the fight flips, not a plan you make.
The highest ceiling of the nine and the least forgiving floor. While she is holding no Pain, Purge turns half of an incoming hit into Pain rather than damage; Exodus of Thorns inflicts Curse on everything nearby and more Pain on her; and at maximum Pain she dodges faster. Played well that is a second bar you spend to buy damage, and being hit is how you fill it. Played badly it is two resources moving the wrong way at once, which is what keeps a Shell this strong out of the top half.
Miracle halts time and leaves you unarmed, applying Chaos stacks that detonate when the clock restarts, and Deadly Revelation only switches on at 10% Health or lower. Both halves want you at the edge of the health bar, which makes Smert the clearest glass cannon here and the worst Shell to inhabit first. He is also the Shell his tree changes most — Fervor raises the Faith threshold and Resilience puts a chance to survive a fatal blow underneath it — so rank the Shell you built, not the one you found.
D is not a verdict on the prologue, it is a verdict on spending anything here. Harros is the only Shell the catalog holds with no passive and no skill tree at all, and the game takes him back regardless. Stone Stun is still the best lesson in the opening hours: whatever it petrifies cannot be hurt while it stands there, only broken — which is Break being explained to you before anything has asked you to manage it. Learn the lesson, and keep the Glimpses for a Shell that stays.
Whichever one you can reach and are willing to stay in. Glimpses spent on one Shell's bond do nothing for another, so the worst outcome on this page is not picking the Shell we put in B — it is spreading a run's worth of Glimpses across four of them and finishing with four half-built trees. Pick from the top two bands, commit, and read the tier-4 nodes before you spend on tier 1.
If you would rather start from a loadout than a Shell, the build guides name a Shell each along with the Seal, weapon, sidearm and Tarstones that go with it — and every stone on those pages is checked against the gear it is recommended for.