
Red Chat Ritual: All Endings and Achievements
On this page (14)
This page shows how to reach the endings of Red Chat Ritual: Tsumimi Time, as far as the routes are known, and how to finish the achievements for 100%. The ending you get depends on which mega chat options you pick, which wishlist items you buy, and which investigation files you put into the answer screen at the end of each chapter.
The short version: there are two separate routes. One route reaches Ending 1 or Ending 2 and needs three key items bought in order (potato gun, stun gun, soundproofing sheets). The other reaches Ending 3 or Ending 5, buys none of those and uses the crystal radio instead. The routes cannot share a run, so plan on two playthroughs. The other endings branch off the same saves. The achievements are cumulative, so they can be built up across many saves.
Spoiler warning: the tables below spell out the final reveals of the story.
Known gaps: no step is known for getting Religious village in mountains of Kanto, Shikabu Line or Fanatical mother, which appear in the final answers, or Basement collaborator on the Ending 3 and 5 route. Which choice separates Ending 1 from Ending 2 is unknown. The split between Ending 3 and Ending 5 is covered under Ending 3 and Ending 5.
| Ending | How you get it |
|---|---|
| Ending 1, Ending 2 | The potato gun, stun gun and soundproofing sheets route |
| Ending 3, Ending 5 | A separate run with the crystal radio, then the 5,000 yen mega chat decides |
| Ending 4 | Exactly one wrong slot on the final answer screen |
| Ending 404 | Two or more wrong slots on the final answer screen |
| Ending 6 | Any one of five mega chat lines, listed under Ending 6 |
| Ending 7 | The "I'm calling the cops" mega chat on stream 10 |
| Ending 8 | A failed chapter 2 answer screen |
| Achievement | What it takes |
|---|---|
| All Endings Completed | See every ending |
| Illustration Collector | Probably unlocks with the last ending |
| Part-Time Job Master | Work all six part-time jobs |
| Master of Presents | Buy every wishlist item in all three chapters |
| Ardent Fan | Pick every mega chat option |
| Great Detective | Collect every investigation file |
Before you start
Some habits save a lot of time on both routes.
- Hold Ctrl to skip dialogue. A launch-day patch added this, along with extra starting money, so the routes are less tight than they used to be.
- Save before every answer screen. You can tell one is coming because the time of day reads late night and you get one last investigation.
- A full day of work pays more than two half shifts. Alternate whole investigation days and whole work days where you can.
- The last chapter needs an investigation almost every day, so bank money in the first two.
- Buy wishlist items at late night, the day before the stream that needs them. Buying in the morning or afternoon did not unlock the dialogue.
- At the time of writing, the first two chapters let you get one slot wrong and still move on. That helps if you are missing a single file.
- Most shop items do nothing. An item matters when its dialogue option shows glitched text, and that only happens for the potato gun, the stun gun, the soundproofing sheets and, on one route, the crystal radio.
- A few mega chat options end the run early or trigger a side ending. They are listed under Ending 6 and Ending 7.
Key items and where they are
| Item | Chapter | How to find it in the shop | What it unlocks |
|---|---|---|---|
| Potato gun | 1 | The 20,000 yen item | A newspaper option on stream 6 |
| Stun gun | 2 | The 10,000 yen item, middle of the top row | "Check the floor" on stream 8 |
| Soundproofing sheets | 3 | The only 20,000 yen item | "Show us what's on the shelf" on stream 14 |
| Crystal radio | 3 | Bought on day 12 (Ending 3 and 5 route only) | The audio-only option on stream 13 |
The stun gun and the soundproofing sheets only turn up if you bought the earlier item and used its dialogue. If one is missing, go back and follow the route from chapter 1.
Ending 1 and Ending 2
Both endings share one route, and the steps below stop at the final answer screen.
Ending 1 and 2: Chapter 1
Buy the potato gun. Night 2 is known to work, and the latest safe time is late night before stream 6.
| Stream | Choose | Then investigate | You get |
|---|---|---|---|
| 4 | "Let me help! Where exactly are you?" | 3 hour trip | 3 hours away (distance) |
| 5 | "They make tunnels shaped like that?" | Hexagonal abandoned tunnel | Hexagonal tunnel |
| 6 | "That newspaper, when's it from?" | Today's Salsei Daily Report, straight away | West ST prefecture |
Stream 5 has another option, "Wouldn't the building have burned down too?". It leads to an Old tunnel and a Flowering Tunnel file. That file is reported to be interchangeable with Hexagonal tunnel on this route, but it is untested whether it keeps the route safe, so the hexagonal one is the cautious pick. The other mega chats in this chapter do nothing for the route.
If you followed the steps above, the chapter 1 answer is below, with West ST prefecture in the newspaper slot.
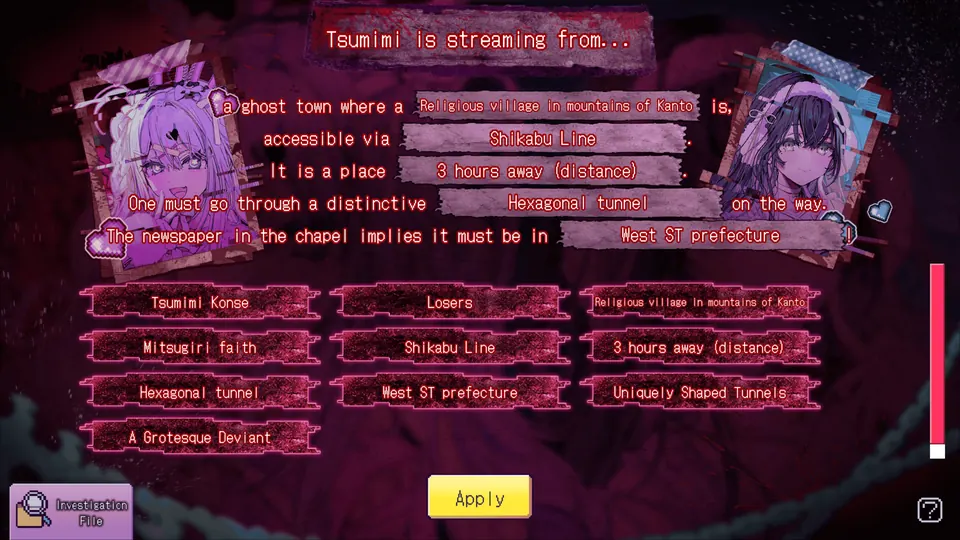
| Slot | Answer |
|---|---|
| Ghost town | Religious village in mountains of Kanto |
| Accessible via | Shikabu Line |
| Distance | 3 hours away (distance) |
| On the way | Hexagonal tunnel |
| Newspaper implies | West ST prefecture |
Ending 1 and 2: Chapter 2
Buy the stun gun on day 7. Make a manual save on day 8, since this chapter sometimes rejects a correct answer. If that happens, go back to that save and try again.
| Stream | Choose | Then investigate | You get |
|---|---|---|---|
| 7 | Anything | Is Mashiro alive? | Mashiro's survival |
| 8 | "Check the floor" | Creepy mannequin, and the church entry | Mannequin's familiar looks, and Church ritual to get one's ideal |
| 9 | "Show just her face" | Nothing needed | Nothing |
| 10 | "Investigate it" | Proof of Joy, the next day | Religious text 'Proof of Joy' |
| 11 | "Under the shelf" | Earring, the same night | Earring |
If chapter 2 works the first time and you want Ending 8, reload the save and put in random answers for this section. The ideal slot takes Church ritual to get one's ideal, not Believers who obtained ideal form. A confusing translation makes the two look alike.
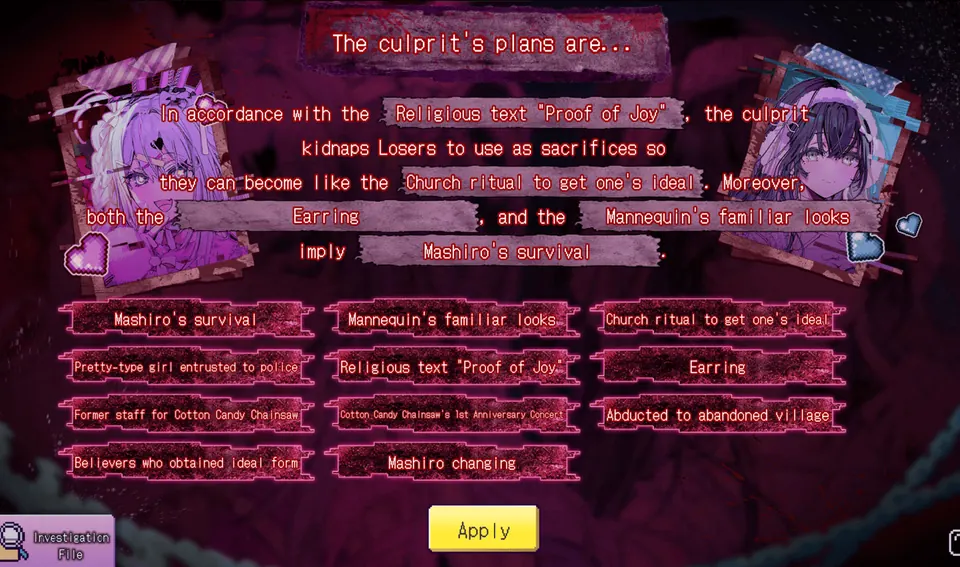
| Slot | Answer |
|---|---|
| The plan follows | Religious text 'Proof of Joy' |
| Becoming like | Church ritual to get one's ideal |
| Two clues, either order | Earring and Mannequin's familiar looks |
| They imply | Mashiro's survival |
Ending 1 and 2: Chapter 3
Buy the soundproofing sheets on day 12.
| Stream | Choose | Then investigate | You get |
|---|---|---|---|
| 12 | "Learn about its history" | Mass Manifestation Ritual | Manifestation Ritual |
| 12 | "Read more of the books" | Offering Ceremony | Parts of Other People's Bodies |
| 13 | "Play it again" | Video's reflection | Tsumimi |
| 14 | "Show us what's on the shelf" | Reina Oshima | Cult survivor |
Stream 13 is the one to watch. Nothing in the game marks "Play it again" as more important than the other options. The remaining choices on streams 12 to 15 can be anything, apart from the one flagged under Ending 6.
Follow these steps to solve the mystery and confront the culprit. The answer is below, naming Tsumimi as the male cultist and Cult survivor as the culprit.
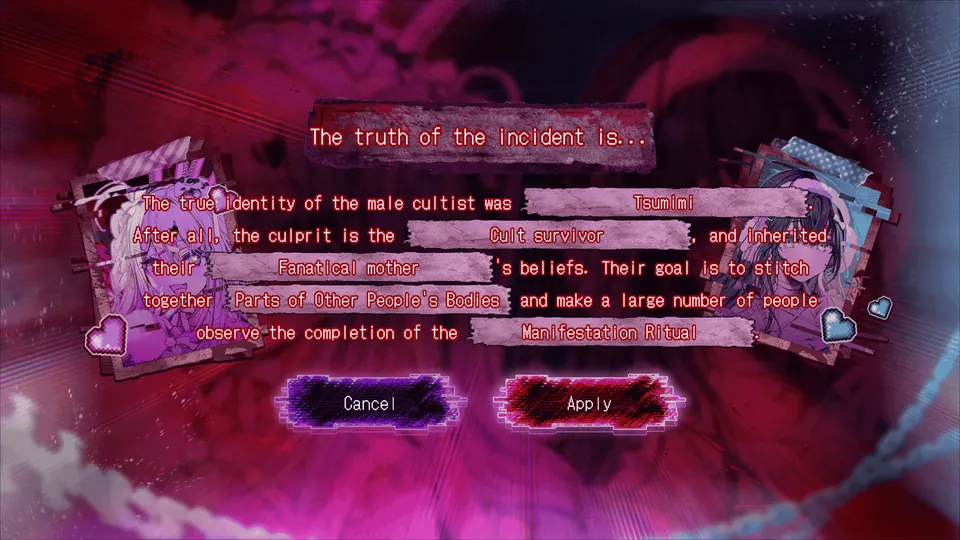
| Slot | Answer |
|---|---|
| The male cultist was | Tsumimi |
| The culprit is the | Cult survivor |
| Inherited the beliefs of | Fanatical mother |
| Stitch together | Parts of Other People's Bodies |
| Observe the completion of | Manifestation Ritual |
The final choice that splits Ending 1 from Ending 2 is not known.
Ending 3 and Ending 5
These two share a route, and it needs a separate run from the one above. Do not buy the potato gun, the stun gun or the soundproofing sheets on it, because the dialogue those items unlock blocks the lines this route needs. You solve the cases with a plainer set of files.
Ending 3 and 5: Chapter 1
| Stream | Choose | Then investigate | You get |
|---|---|---|---|
| 4 | "Let me help! Where exactly are you?" | 3 hour trip | 3 hours away (distance) |
| 5 | "They make tunnels shaped like that?" | Hexagonal abandoned tunnel | Hexagonal tunnel |
| 6 | "Show us the newspaper" | Sai TV, straight away | ST prefecture |
For chapter 1, the day 4 stream gives the 3 hour trip and the day 6 stream gives Sai TV, which fills the newspaper slot with plain ST prefecture instead of West ST prefecture. Flowering Tunnel may stand in for Hexagonal tunnel on this route, but it has not worked for everyone.
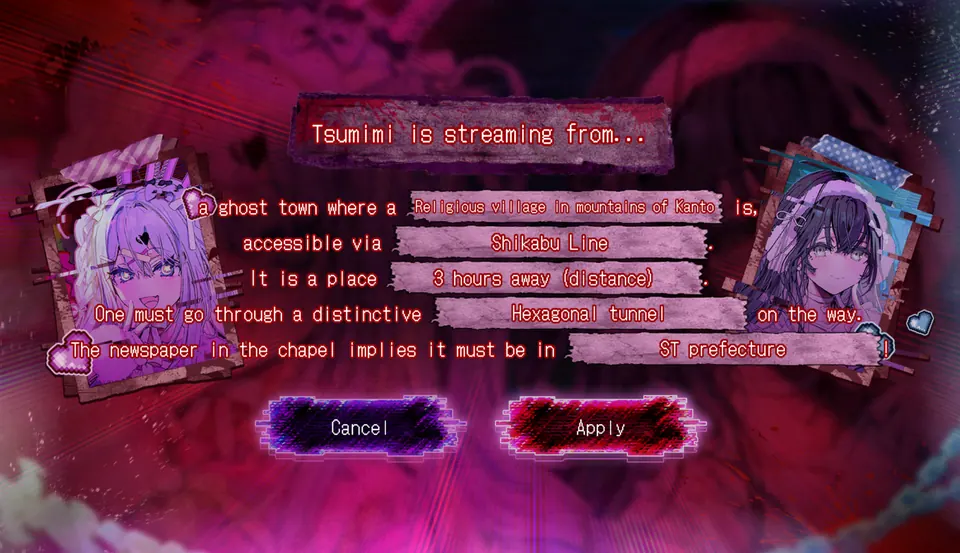
| Slot | Answer |
|---|---|
| Ghost town | Religious village in mountains of Kanto |
| Accessible via | Shikabu Line |
| Distance | 3 hours away (distance) |
| On the way | Hexagonal tunnel |
| Newspaper implies | ST prefecture |
Ending 3 and 5: Chapter 2
| Stream | Choose | Then investigate | You get |
|---|---|---|---|
| 7 | Anything | Is Mashiro alive? | Mashiro's survival |
| 8 | Anything | Creepy mannequin | Mannequin's familiar looks |
| 9 | "Show us her fingers" | Nothing needed | Nothing |
| 10 | "Investigate it" | Proof of Joy, the next day | Religious text 'Proof of Joy' |
| 11 | "Under the shelf" | Earring, the same night | Earring |
Chapter 2 answer: with Proof of Joy and the earrings from Under the shelf in hand, the ideal slot takes Believers who obtained ideal form, not the church ritual file from the other route.
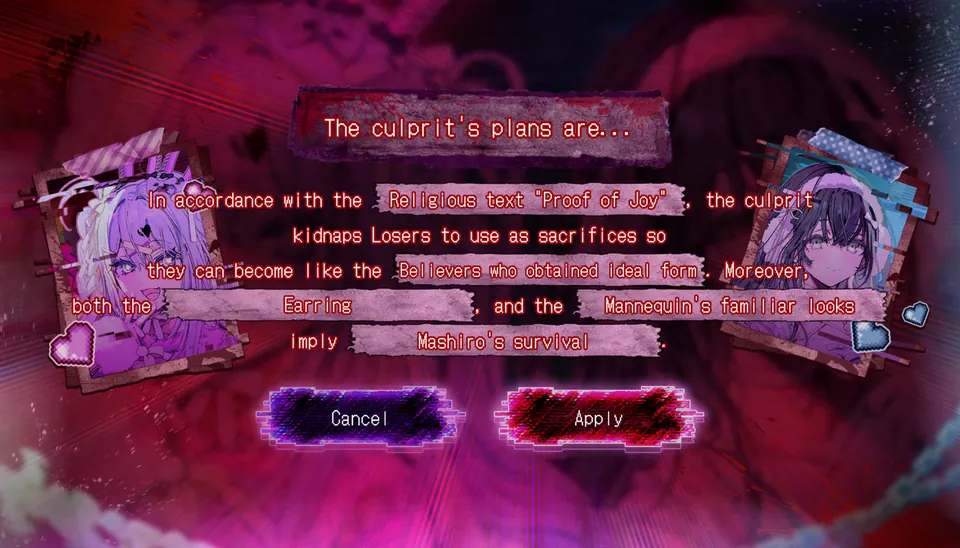
| Slot | Answer |
|---|---|
| The plan follows | Religious text 'Proof of Joy' |
| Becoming like | Believers who obtained ideal form |
| Two clues, either order | Mannequin's familiar looks and Earring |
| They imply | Mashiro's survival |
Ending 3 and 5: Chapter 3
Buy the crystal radio on day 12 and gift it before the next day begins. It is the key to both endings.
| Stream | Choose | Then investigate | You get |
|---|---|---|---|
| 12 | "Learn about its history" | Mass Manifestation Ritual | Manifestation Ritual |
| 12 | "Read more of the books" | Offering Ceremony | Parts of Other People's Bodies |
| 13 | "Play just the voice" (the audio-only mega chat) | Realistic | Victim of the Anguished Scream |
On the final screen the male cultist is Basement collaborator and the culprit is Victim of the Anguished Scream.
The last decision is a 5,000 yen mega chat. Skip it for Ending 3. Send it for Ending 5. Ending 3 is reported to be the true ending and Ending 5 a joke ending, so do Ending 3 first.
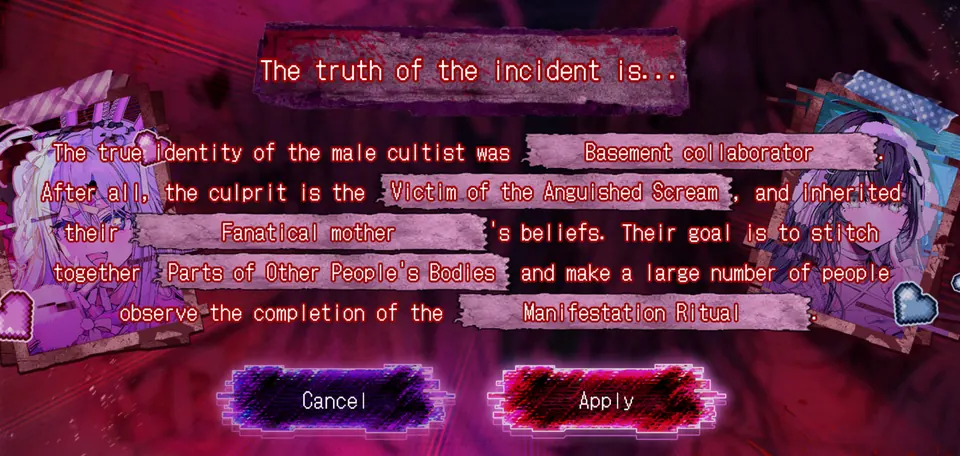
| Slot | Answer |
|---|---|
| The male cultist was | Basement collaborator |
| The culprit is the | Victim of the Anguished Scream |
| Inherited the beliefs of | Fanatical mother |
| Stitch together | Parts of Other People's Bodies |
| Observe the completion of | Manifestation Ritual |
Ending 4
Ending 4 plays when exactly one slot is wrong on the final screen. Putting Fanatical father in place of Fanatical mother is an easy way to cause it. It works on either route. The correct files differ by route, but the ending itself does not.
Ending 404
Put two or more wrong answers on the final screen and you get Ending 404. The route you took does not change this.
Ending 6
Ending 6 comes from any one of these mega chat options, on either route.
| Day | Mega chat |
|---|---|
| 2 | "my love must've reached her" |
| 4 | The line about touching the dead animal and no longer being an idol |
| 5 | The line telling her to call the police because it is too dangerous |
| 9 | "show us her body" |
| 12 | The line saying the writing looks like her handwriting |
Ending 7
Send "I'm calling the cops" as a mega chat on the day 10 stream. The ending plays the next morning, on day 11.
Ending 8
Ending 8 plays when the chapter 2 answer screen fails. To see it on purpose, follow the note in Chapter 2 of the Ending 1 and Ending 2 route.
All Endings Completed and Illustration Collector
All Endings Completed unlocks after you see every ending. Illustration Collector most likely unlocks at the same time, since each ending has its own illustration, though extra hidden illustrations are not ruled out.
Part-Time Job Master
This achievement needs every part-time job worked. It carries over between saves, so load older ones as needed. You may need to take both an AM and a PM shift at least once. Working part time on every day of one run is another way to get there.
The jobs listed on each day are fixed, but no day-by-day list is known, so play through several days to see all six.
| Job | Shift | Pay |
|---|---|---|
| Furniture delivery ride-along assistant | AM | 8,000 yen |
| Business hotel guest room cleaning assistant | PM | 5,000 yen |
| Pub dishwasher and simple cooking assistant | AM | 5,000 yen |
| Sorting goods in a warehouse | AM | 5,000 yen |
| Stocking shelves at a drugstore | AM | 5,000 yen |
| Event hall setup and cleanup staff | AM | 8,000 yen |
Master of Presents
Buy every gift from Tsumimi's wishlist in all three chapters. You can do this over several saves, and if you are short of money, just keep working, since this achievement needs no investigating.
Note that on the Ending 1 and Ending 2 route the wishlist swaps two items. In chapter 2 the stun gun replaces the Survival Knife, and in chapter 3 the soundproofing sheets replace the Sewing Practice Kit. Buy those too. On the Ending 3 and 5 route, buy whatever new items show up.
Ardent Fan
Choose every mega chat option at least once. Load a save from each chapter, replay the stream, and pick the options you have not tried. Doing it while you work on Great Detective saves time.
Great Detective
This achievement means finding every file. Load your saves from each chapter, then investigate every keyword you have not seen yet in the morning and afternoon. Different mega chats give different keywords. The last stream of chapter 2 has many, so expect to replay that stream and the final investigation of day 11 several times.
This pairs well with Ardent Fan. Let the day roll over after each stream and investigate the new nodes before loading your save again. One or two nodes might only appear if you send no mega chat at all, so if the achievement is still missing, do a run that skips them all.