
Queen's Domain Beginner Tips
On this page (8)
Hit once with a full Power Meter, back off while it refills, then hit again: that rhythm is the core of combat in Queen's Domain. This page also covers the HUD, your stats, saving and resting, status effects, where Ancient Coins come from and where you spend them, and how to fast travel.
Save at a Crystal Monument as often as you can, because there are no automatic checkpoints. Resting heals you but brings every enemy back. The fast travel section lists three ways to get back quickly.
Spoiler note: the HUD table names the Storm Gem and the Tower of Knowledge, and the Resting section mentions one early camp change.
The HUD
Each element of the HUD and what it means is listed below, numbered to match the screenshot.
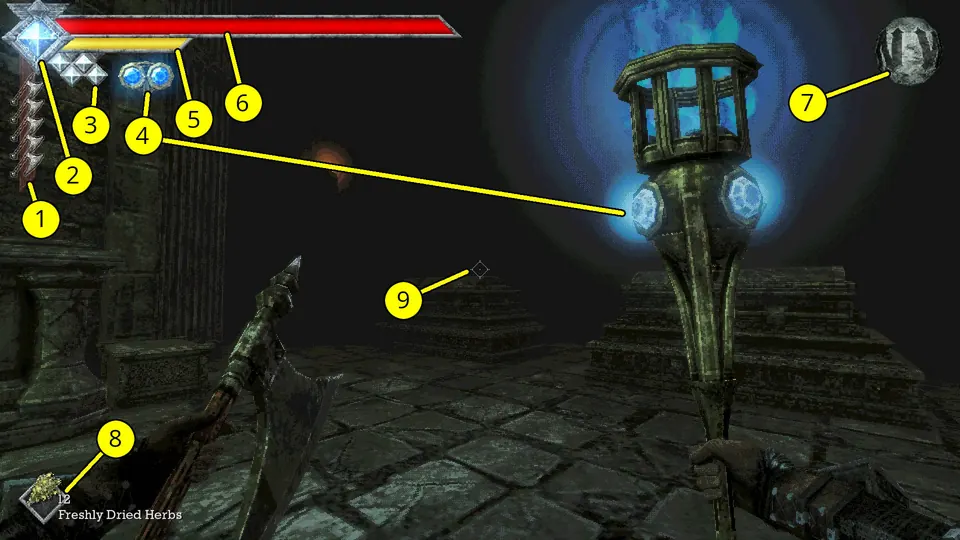
| # | Element | What it does |
|---|---|---|
| 1 | Dagger Belt Charges | Shows how many charges your equipped throwing weapon has. Each throwing weapon takes its own time to recharge. |
| 2 | Special Attack Meter | Shows the charge of the special attack for the sword Endu. Nothing happens with it until you obtain the Storm Gem, found in the Tower of Knowledge (the game's third big zone). |
| 3 | Wind Dash Meter | Counts your Wind Dashes. Each dash uses up one diamond, and diamonds refill slowly over time. You gain extra charges as you find more Wind Gems. |
| 4 | Weapon Special Meter | Some weapons have a special ability that charges over time or by hitting enemies. Its meter sits to the right of the Wind Dash meter while that weapon is equipped. The weapon model itself often shows the same glow, as the Azure Torch does. |
| 5 | Power Meter | Your stamina. It also sets how hard you hit, see Combat Basics. |
| 6 | Life Points | Your health. At 0 you die. |
| 7 | Compass | Shows which way you face. There is no map in Queen's Domain, so the compass and the landmarks around you are how you find your way. If you get lost, look around the area for a path you missed. |
| 8 | Quick Slots | The items at the bottom left. The Use Item key (F by default) uses the selected one, and the scroll wheel cycles through them. Remove items from Quick Slots in the inventory to shorten the list. |
| 9 | Crosshair | Shows where you aim, and lights up when you are looking at something you can interact with. |
Understanding Your Stats
Open the Status & Inventory menu to see your stats. Here is every line you will find there.
| Stat | Meaning |
|---|---|
| Level | Killing enemies earns EXP. Each level up raises your base maximum Life Points and Attack Power. |
| EXP to Next | EXP still needed for the next level. The bestiary lists how much EXP each monster gives. |
| Total EXP | All the EXP you have earned so far. |
| Life Points | Current and maximum health. |
| Status | Names any debuff you currently have. |
| Attack Power | Your base damage. The weapon you hold adds to it. |
| Attack Speed | Any bonus to how fast you attack. |
| Magic Rate | Any bonus to how quickly magic weapons recharge. |
| Damage Res | Your general resistance to damage, as a percentage. |
| Poison Res, Heavy Res and the rest | Resistance to each specific negative status effect, as a percentage. |
Levels are not the only way stats change. Certain foods help too: Broiled Meat, for example, gives a small permanent boost to Attack Power. Resistances mostly come from accessories, which you can find in the world or buy in the shop.
Combat Basics
Spamming attacks does not work in Queen's Domain. How much damage you deal depends on your Power Meter, the yellow bar under the Life Points bar.
- Swing a melee weapon with the Power Meter full and you deal full damage on contact.
- Swing with it empty and you deal almost nothing.
- Attacking nonstop gives the meter no time to refill, so every hit is weak.
The better rhythm is to hit once with a full meter, back away while it refills, then hit again.
Running and the Power Meter
Running drains the Power Meter. You can still run at zero, but the meter will not refill until you stop. A Wind Dash also takes some of it, on top of using a diamond from the Wind Dash Meter. In a fight, avoid running when you can, so the meter stays available for your attacks.
Charged attacks
You can hit harder by charging. Hold the primary attack button (left-click on PC by default) and the Power Meter turns blue. Once it is fully blue, your melee hit does maximum damage.
There is a cost. While you hold a charge you cannot run, Wind Dash or use throwing weapons. The upside is that you can start a charge while the meter is still refilling, so you do not have to wait for it to be full.
Saving at Crystal Monuments
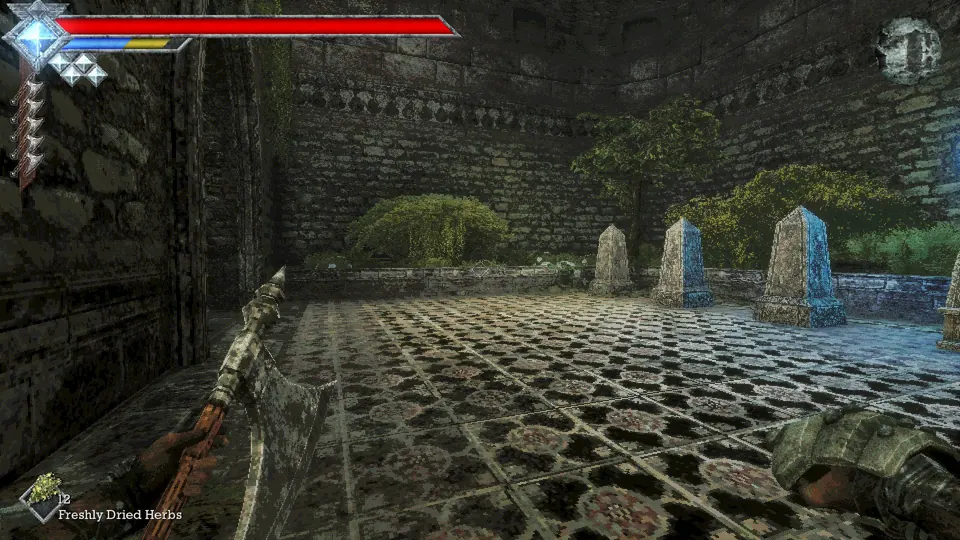
There are no automatic checkpoints. You save by hand at a Crystal Monument, and if you die you load your last save and lose everything since. Because saving as often as you like has no real downside, save at every chance. Sometimes it is smarter to walk back to an earlier Crystal Monument to save than to push on with a risky run.
Resting and Monster Respawns
A Crystal Monument also offers Rest. Resting fully restores your health and removes every negative debuff you have.
The catch is that resting respawns all enemies. If you cleared an area and went back to a monument to heal, you will fight through those enemies again.
Waiting does not avoid this either. Enemies also return after a certain amount of time. When you cross an area you already cleared, expect some of its monsters to be back.
The world also changes as you progress. The knights camped at the start and near the Endu Shrine are wounded or resting on your first visit. After you complete some objectives and return, they are dead and monsters have taken over the camp. Reaching the end of a dungeon or path often unlocks a shortcut, ramp or elevator that makes the way back easier.
Status Effects
There are nine core negative status effects. Most of them wear off on their own, so without the right curative item you can usually wait one out. Resting at a Crystal Monument also clears them (see above). The Status line in the inventory tells you which one you have.
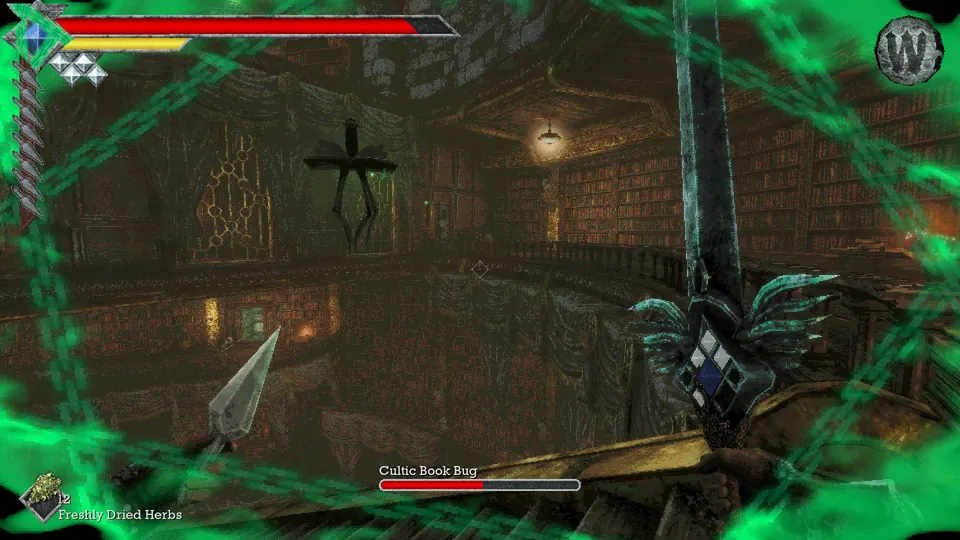
| Effect | What it does | How it looks on screen |
|---|---|---|
| Poison | Drains life points slowly over time. | Purple mist |
| Heavy | Slows your movement and slows Power Meter regeneration. | White lines falling down the screen |
| Weaken | Raises the damage you take. | No on-screen effect noted |
| Disease | Lowers the damage you deal. | Black cloud that narrows your vision |
| Sticky | Stops you from using throwing weapons. | Spider web over the screen |
| Binding | Stops all magic, so magical weapons such as the Azure Torch's ranged fireball cannot be used. | Glowing green chains |
| Paralysis | Prevents all movement and attacking. | No on-screen effect noted |
| Azure Flame | Drains life points while you burn. | Blue flames |
| Magic Rot | Builds up slowly, then drains life points quickly. | No on-screen effect noted |
Treasure and Ancient Coins
Early on the Isle of Neasied, you will find an Ancient Coin. This is the game's currency, and the only place to spend it is the shop. The shop opens once you defeat the first boss.
Some pickups seem to have no use, such as the Filthy Loot Sack. Some of them count as Treasure, and the shop buys Treasure for Ancient Coins.
How to Fast Travel
There are three ways to fast travel, which helps a lot with no map to guide you.
| Method | How it works |
|---|---|
| Travel Crystal Fragment | A consumable that returns you to the last Crystal Monument you saved at. |
| Wing Altar | A waypoint you can travel between once discovered. There is generally one in each zone. |
| Wing Stone Fragment | A consumable that takes you to any Wing Altar from wherever you stand. It is used up when you travel. |